Showing posts with label Recipe. Show all posts

Tuesday, October 2, 2012

Impossibly Easy Gluten-Free Deliciousness (a.k.a Cheesecake)...

Okay, I'm gonna say that this recipe has basically saved my poor gluten-free life (though not my waistline... unfortunately, haha)!!  My one biggest problem with going gluten-free has been the lack of yummy treats.  I'm not a huge baker in the first place, and gluten-free flours and baking really freaks me out, so there has definitely been a lack of sugary goodness in my house for the last couple of months.  Luckily, I found a way to modify this super easy recipe to be gluten-free!


What you'll need:
  • 3/4 cup milk
  • 2 teaspoons vanilla
  • 2 eggs
  • 1 cup sugar
  • 1/2 cup Gluten-Free Bisquick® mix
  • 2 packages (8 ounces each) cream cheese, cut into about 1/2-inch cubes and softened 
  • (Optional, strawberry glaze or other topping)

What to do:
  • First, heat the oven to 350°F and grease 9-inch pie plate.  
  • Next, place milk, vanilla, eggs, sugar and the Bisquick mix in blender. Cover and blend on high speed 15 seconds. Add the cream cheese. Blend 2 minutes longer. Pour into pie plate.
  • Last, but not least, bake 40 to 45 minutes or until knife inserted in center comes out clean; cool.  If you want to add a topping, this is the time to do it! Refrigerate until ready to serve. Cover and refrigerate any remaining cheesecake.

I LOVE this stuff, I try to make sure Karl eats at least one slice... you know, to make me feel like I'm not eating an entire cheesecake by myself, haha!  For the original recipe, go HERE ;)  Enjoy!!

Thursday, August 23, 2012

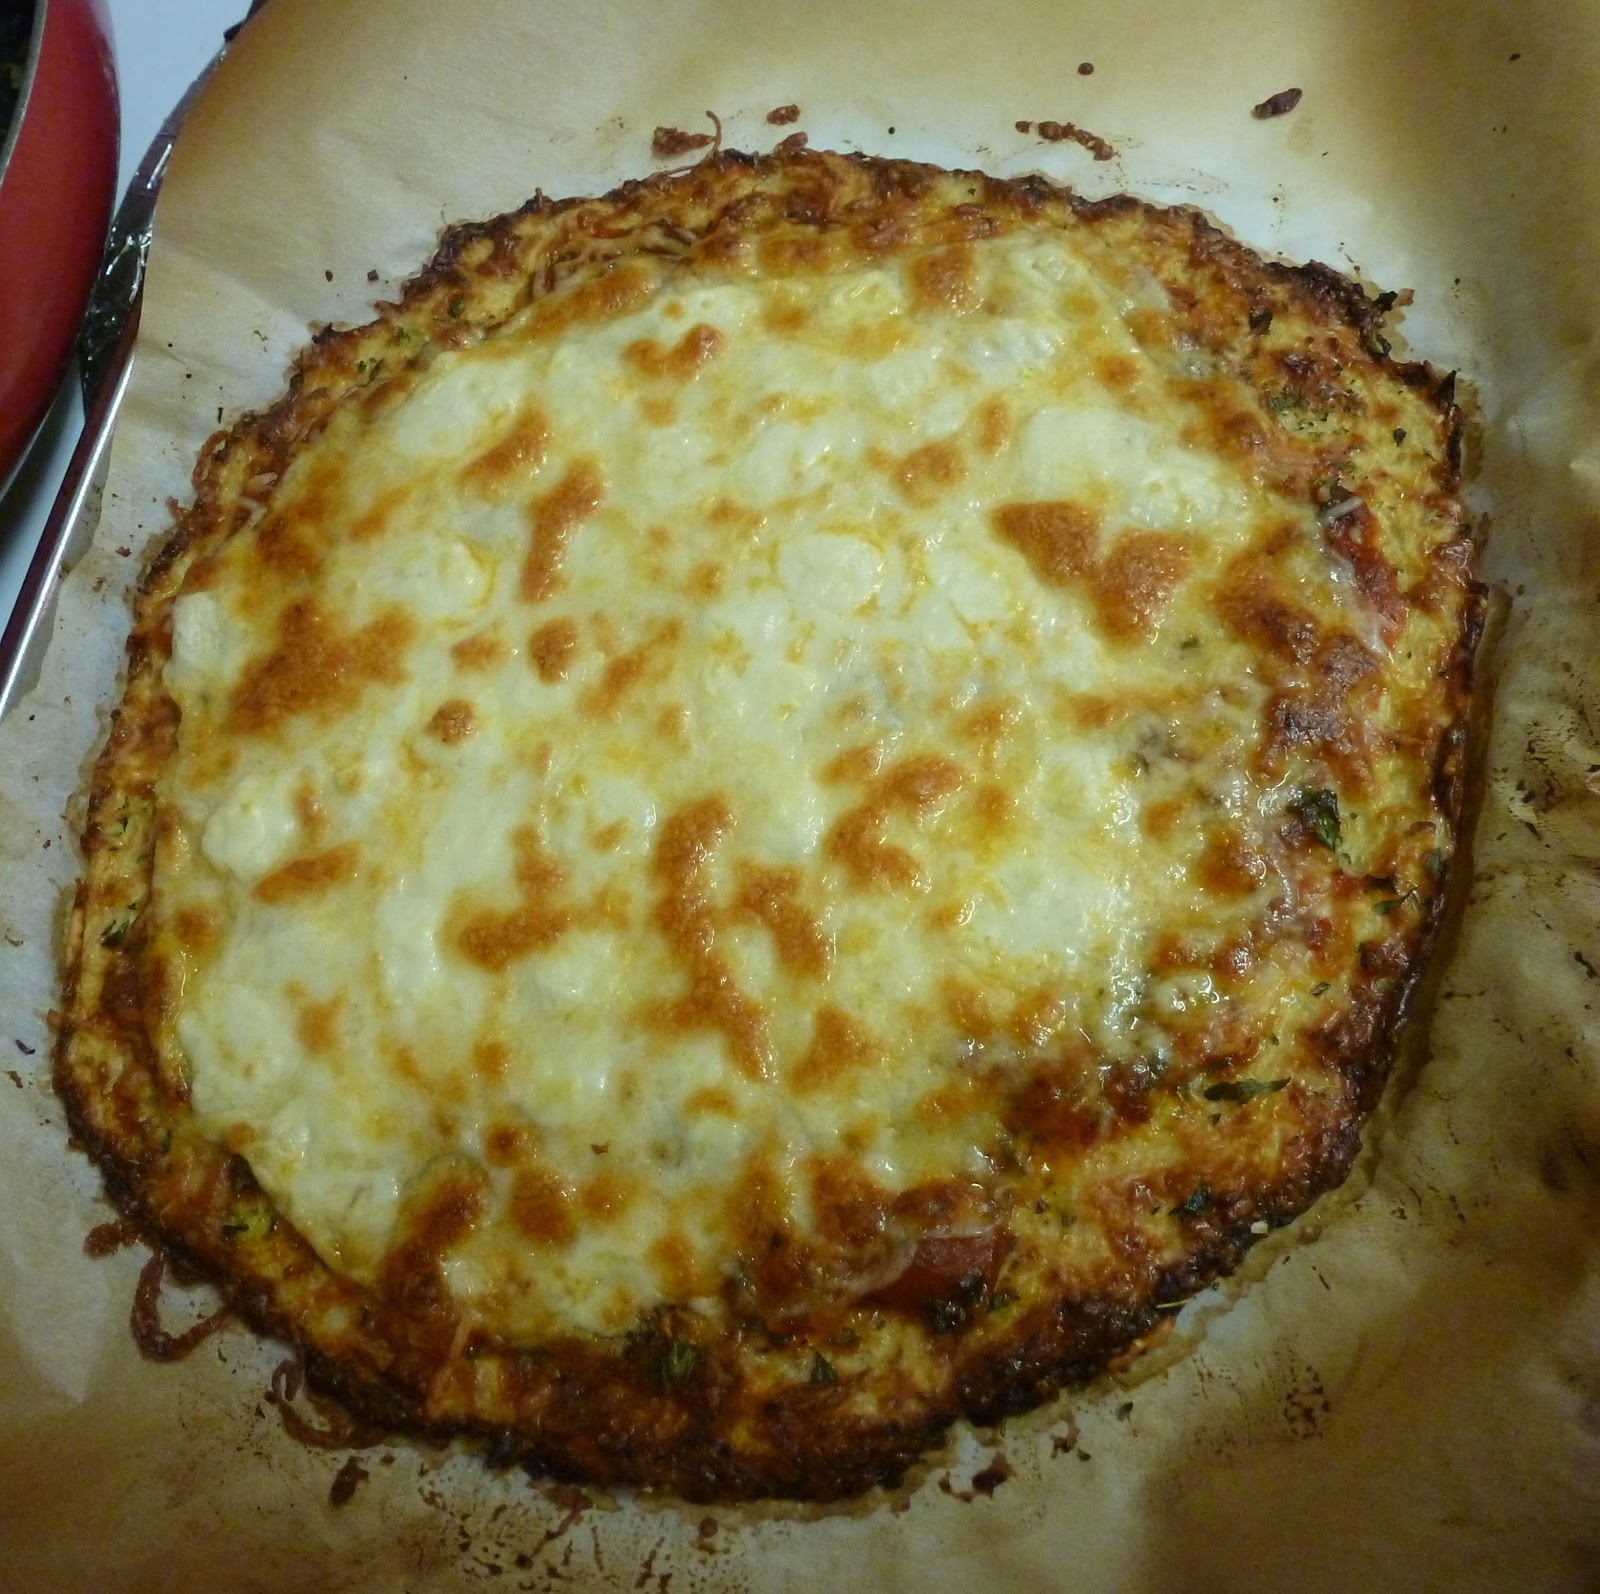
Cauliflower-Crust Pizza


Yes, you heard that correctly... I said cauliflower pizza crust... as in a pizza crust made from cauliflower (and a couple other things)!  AND, it actually tastes pretty darn good!  I got Karl to eat it and he hates veggies in most forms!!  So, if you're looking for a gluten-free/low-carb pizza option that is relatively cheap, this is for you.

The first thing you're going to need is riced cauliflower... How the heck do you "rice" cauliflower, you ask?  Well, it's actually not too hard, especially if you have a food processor (which I don't...)  Anyway, for this part you'll need:

  • 1 bag of frozen cauliflower (these usually come in 16 oz packages, I believe, though this will give you way more than enough cauliflower for your pizza)
  • A food processor, or a cheese grater
  • Cheese cloth or a plain dish towel

1. Microwave your frozen cauliflower in a covered microwavable dish until cooked.  Don't add water when cooking.  Time wise you can most likely go by the package/any adjustments you need to make for your particular microwave oven.

2. When the microwave beeps, take out your bowl and carefully drain any water off your cauliflower.  Let it cool.

3. Time for the ricing!  I simply use a regular cheese grater and grate my cute little cauliflower florets... but it is a bit of a pain, and this can happen:

One of the dangers of ricing by hand... Baby attacks!
If you have a food processor you can use that to get your cauliflower to a rice like consistency.

4. If your cauliflower rice is very juicy (which it will most likely be) then I suggest putting your rice in some cheese cloth or a dish towel/piece of fabric and using that to squeeze as much of the water out as you possibly can before continuing with the crust.

Alrighty, now we're ready for the actual crust/pizza making... For this part you'll need:

  • 1 cup riced cauliflower
  • 1 egg
  • 1 cup grated Italian blend cheese (I like one that has parmesan, asiago, fontina, etc.)
  • 1 tsp oregano
  • 2 tsp parsely
  • Pizza Sauce
  • Mozarella cheese (or you can use the Italian blend again, which is what I like to do)
  • Pizza toppings (we will just be broiling to melt the cheese, so make sure any toppings are already cooked and safe to use!)

1. Preheat oven to 450 degrees Fahrenheit.

2. Spray a cookie sheet with non-stick spray.  I also like to use parchment paper.

3. In a medium bowl, combine your cauliflower, egg and Italian blend cheese. Press evenly on the pan with your fingers. It works best if you kind of spoon the mixture out over the whole pan and press it into shape from there.  Make sure that it's the same thickness in the middle as it is on the edges, this will help keep it from being sloppy and "un-crust-like".

4. When you have your crust all pressed out, sprinkle it evenly with your oregano and parsley.

5. Bake at 450 degrees for 12-15 minutes.  The first couple times I tried this my crust turned out a lot soggier than I wanted it, but cooking it for the longer time really helped!


5. Remove the crust from the oven and add your sauce, toppings, and cheese!

6. Put your assembled pizza back in the oven under the broiler until the cheese is melted.  This can happen pretty quickly, so keep a close eye on your pizza!!


And voila! Your magical cauliflower pizza is ready!  I originally got this recipe from Your Lighter Side, which is a great blog for low-carb (and incidentally gluten-free!) recipes.  I hope you enjoy it as much as we have!!

Wednesday, November 4, 2009

Meal plans/how to make “The Perfect Baked Potato”

-->
-->
                      
So, my current goal is to come up with a weekly meal plan.  I’m REALLY hoping that this will help me out with some of my reluctance to cook dinner!  I feel like there are just some days when I don’t feel like cooking, and then I use the excuse that I have no idea what to cook, and procrastinate until nine o’ clock at night and we end up eating corn dogs out of the freezer.  If I have my meals set, then I don’t even have to think about it! Well, ok, knowing me I’ll have to spend an entire three minutes remembering what day it is in the first place, but that’s much better than what I’ve been doing!  So, my idea is this, I’m making a list of every meal I can possibly think of to make (and that I know my DH will eat after I get it made!) and then taking into account things like which days I have class until late in the evening, or days when I don’t have many classes and will be able to put more time into the preparation.  Then I’ll assign meals to days accordingly.  With a little help from my dearest Mr. Smith, I hope this will be a success!
The first time I considered this plan I got really excited, and then realized that I was having a VERY hard time coming up with seven different dinner ideas.  I finally figured something out and put my now half-hearted plan into action.  Baked potatoes from the microwave were the last meal I finally eked out of my head and the day to make them rolled around.  I made the potatoes, made my DH eat them, they weren’t very good, and he told me that he didn’t really want to eat baked potatoes ever again.  I was devastated.   My seventh meal had just been vetoed and I didn’t know what to do.  So I quit, as I am so apt to do when my plans fail.  However, after a period of grieving I’m back in the saddle and with a little research and experimentation, I have come up with a solution to my problems!  It is my version of “The Perfect Baked Potato”!  Baked potatoes are now DH’s favorite meal!  So here’s how I made my poor potatoes edible (warning, this is not an extra healthy low fat/no calorie method of baking a potato!): 
1.       Preheat the oven to 400 degrees.
2.       Wash your potatoes and get all that yucky dirt off/cut any bad spots off the potatoes.
3.       With a fork, stab each potato 4 times down the length of the potato on each side (so 8 stabs all together).
4.       Rub the skin of each potato with olive oil.
5.       Sprinkle a little bit of salt onto the potato and distributed it evenly over all the entire skin.  You don’t need too much, just enough to give the skin a little flavor :)
6.       Sprinkle a couple of dashes of garlic powder onto the skin and rub all over.
7.       Put the potatoes directly on to a cookie sheet and cook for 45 minutes.
8.       When the potatoes are done they should be tender when you stick a fork in them.  Now you’re ready to eat them!  Throw on all your favorite baked potato toppings (cheese, sour cream, tomatoes, peas, bacon, ranch dressing, onions, or even just salt and pepper!) and enjoy!


Daisypath Anniversary tickers
Lilypie Fourth Birthday tickers
Lilypie First Birthday tickers